Busyboards unleash inventive thinking.
It’s one of the most amazing sources of out-of-the-box ideas for an engineering mind. For girls and boys, and everyone.
Inspiration
Nailed it!
Scroll below for this busy board DIY step-by-step making process.
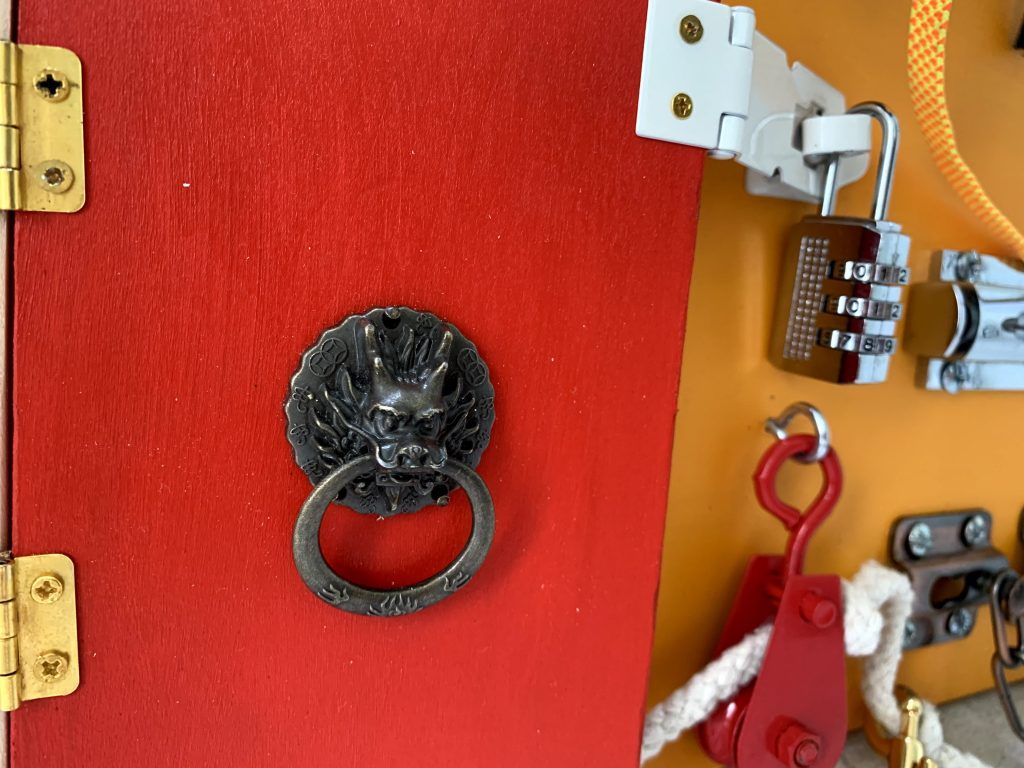
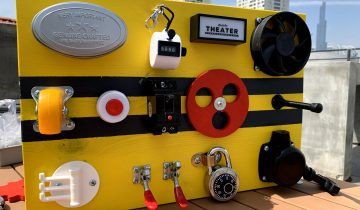
We loved making this customized busyboard for one-year-old girl with a beautiful name Petra. Her mother wanted Petra to enjoy the fun toy, but also work her way up to some life skills by including a code lock and a zipper.

How to NAIL busy board DIY PROJECT?
Start off with sanding your board thoroughly. Pay attention to the edges and corners. Then think of a design and paint it. Acrylic craft paints will be just fine. Use painters tape and cutter knife where needed to get the good crisp lines.


Lay out the elements you’ve picked for your busyboard, one by one. If your design calls for a centerpiece, start with it. Mind the space between parts. Everything has to operate smoothly and be easily accessible. For the extra puzzle level, think through the possible interactions between different chains, locks, and buttons.


When you have all elements in place, take a pencil and mark each drill hole. Then take all parts off and pre-drill the marked spots. Make sure your drill is smaller diameter than the screws you use. Seems over-the-top, but actually, pre-drilling these will save you lots of headache on assembly step.


Start putting all parts together. Note beforehand that you will probably need different screws for the different elements. If your board is 3/4 inch thick, you will need a good couple of handfuls of 1/2 inch short screws and maybe several longer ones.
Parts like the bell or a car horn can be tricky to mount, but with proper fixtures, you’ll get there. If you come across any sharp-ish imperfections on your parts, sand them down until everything is smooth and safe.


Small toys fit perfectly with the pouches and little shelves. Put some pictures behind the doors. Add stickers or draw dots on the wheels. Throwing in these final touches will bring even more personalization.
Now you know how to make busyboard step-by-step! Awesome.


Leave space for extra creativity


Let the little owner bring in their own elements and customize busy board playspace with all power of their imagination. It’s also a great way to keep the objects & puzzles updated to the right age level as kids grow up.
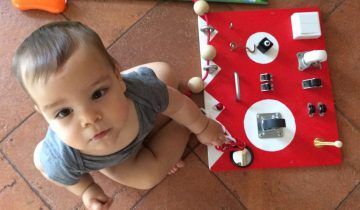
Learning while playing is cool and effective. As parents, we get surprised every day how the nuggets of knowledge just stick to the kids’ brains from everything they come across. And nothing is easier than including these in a busy board.

What do I put under the doors?
Don’t wonder too hard. Here are few ideas that’ll work great:
a funny face drawn on a piece of paper
a small family photo
a sticker with a favorite cartoon character
Pieces of washi tape with numbers or ABCs
What is a multifunctional element?
A simple pulley with a rope and two 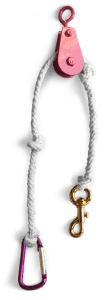 wooden beads can hone the cause-effect understanding of babies. Attach a carbine, and toddlers will use it totally out of the box to lock up the latches and connect various parts. Big kids will figure out the engineering solution of two carbines on a block and learn to weigh up objects.
See our Busyboardipedia for even more info & step-by-step making DIY tutorials.
Want to make a busyboard, easy?

 No products in the cart.

Love so much the bell.
Thank you, Vlad! This one sounds just great, too, not too loud 😀
Very inspiring! Need to get one for my lil one’s birthday ?
? Thank you!
Such a cool idea for child growth and development!?
Thank you, Lusia! And it’s FUN, too.