

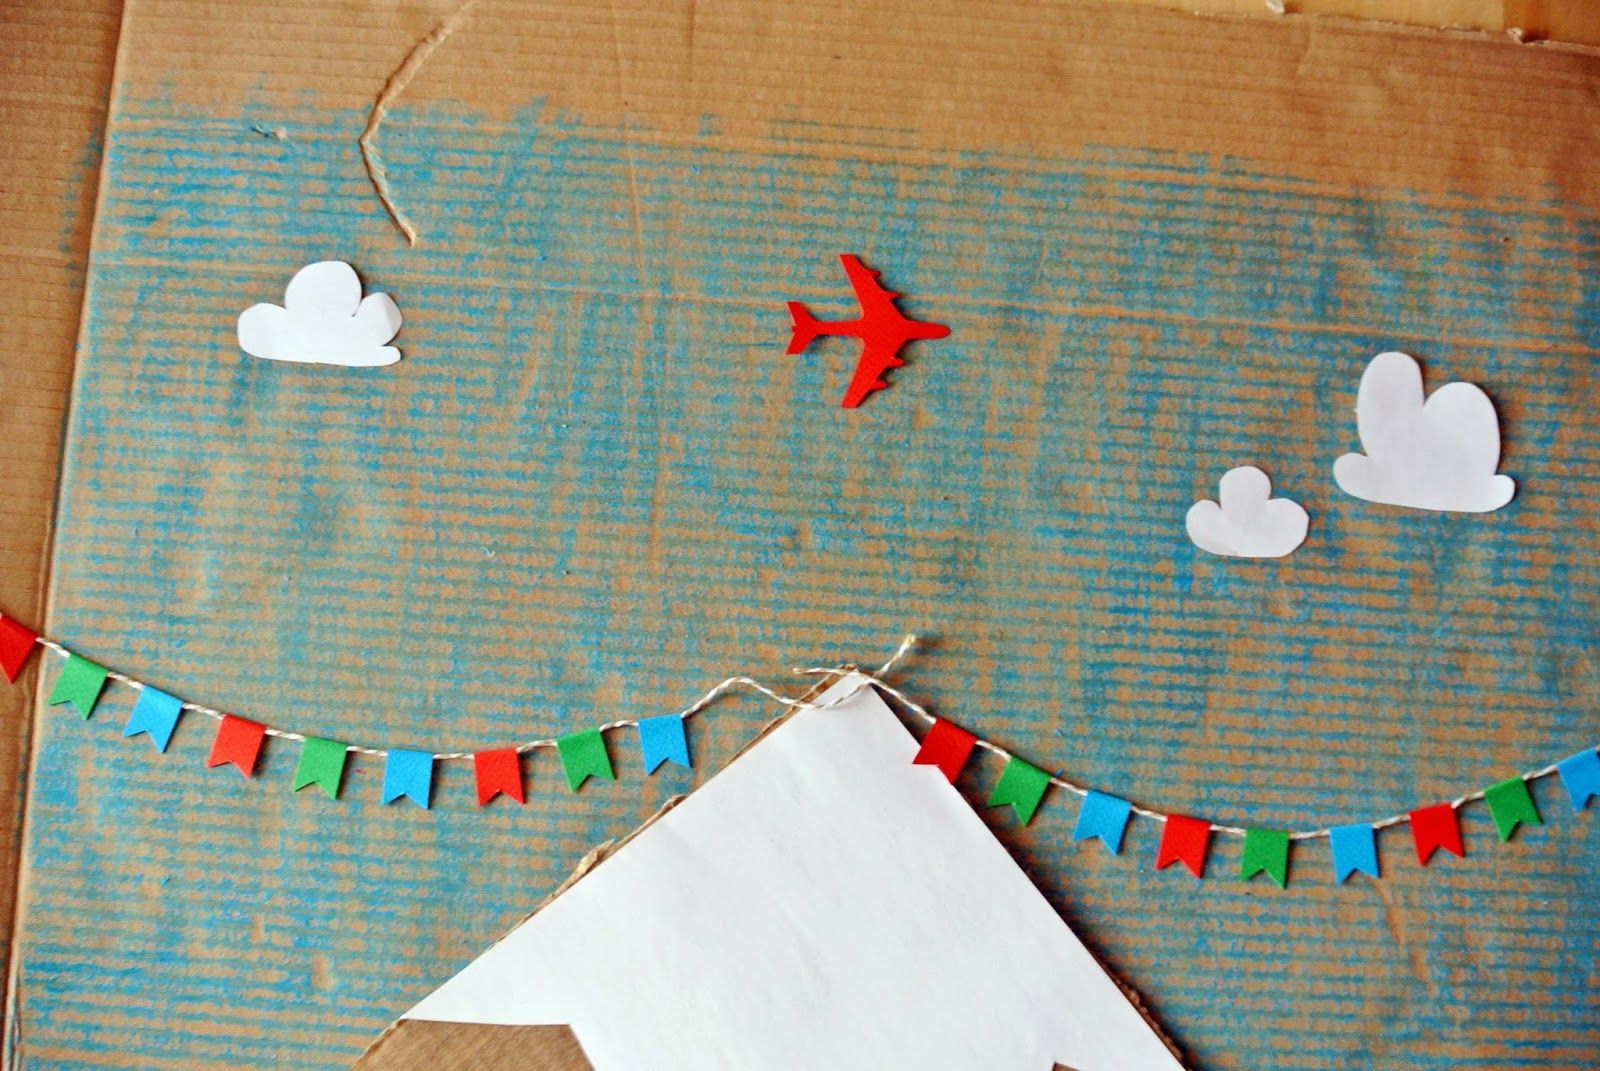
Where did this cardboard art come from? Well, I stenciled clouds on nursery walls.
But it definitely wasn’t enough. White walls are great, they add light and space, but they’re so… white. I needed decorations. And I had this piece of cardboard box.
Reasons why I love cardboard:
1. you always can find it somewhere in your house;
2. it’s large and free;
3. it’s easy to work with;
4. it has its own lovely, crafty texture.
For the art like this you’ll need: 2 pieces of cardboard (1 large and 1 small for mountain), a sheet of white paper (plain printer a4), twine or string, colored paper, hot glue & glue stick, crayons. You also need to find an airplane silhouette you like, print it on colored paper and cut out. Or you can skip the plane. Garland will do just fine.
First, take blue crayon from your kid’s stash and color the cardboard, the thicker the better. I colored only the area I needed, and cut the rest after finishing whole piece.
As you can see, my mountain is a corner of cardboard sheet, rotated 45º. Color mountain with pencil (not black crayon, it’s too dark). Roughly cut out the snowy top and glue it to mountain. Draw and cut out some clouds.


I just hot-glued the whole thing to the wall.
That’s it! – the big bright spot I needed at our messy, messy white nursery.

 No products in the cart.
Comments (3)
Comments are closed.